When your data extraction task requires date input to be filled, it is wiser to add a date input field, using the date picker method, that allows the Worker to select a date value instead of manually typing them. This tremendously reduces the likelihood of mistakes.
The same goes for number input. The unavoidable mistake of typing non-numeric values into the form will be eliminated when Workers are only allowed to choose from only numeric value and click on the correct number they intend to submit.
These input fields can be very useful for data extraction type of jobs, and for any other projects requiring date and number field input.
___________________________________________________________
To apply date input in your template, you can simply use following tag for date input:
<input class=”date” type=”text” />
It will display mm/dd/yyyy date format.
For number input, you can use following tag so it takes only numeric input:
<input type=”number” />
___________________________________________________________
Let us take the example used from a previous tutorial for Data Extraction.
These are the type of jobs that would commonly require date and number input.
We can modify the template (you need to Login to view template) used in this data extraction campaign so we can add date and number fields.
We can then have something like this (from Workers view):
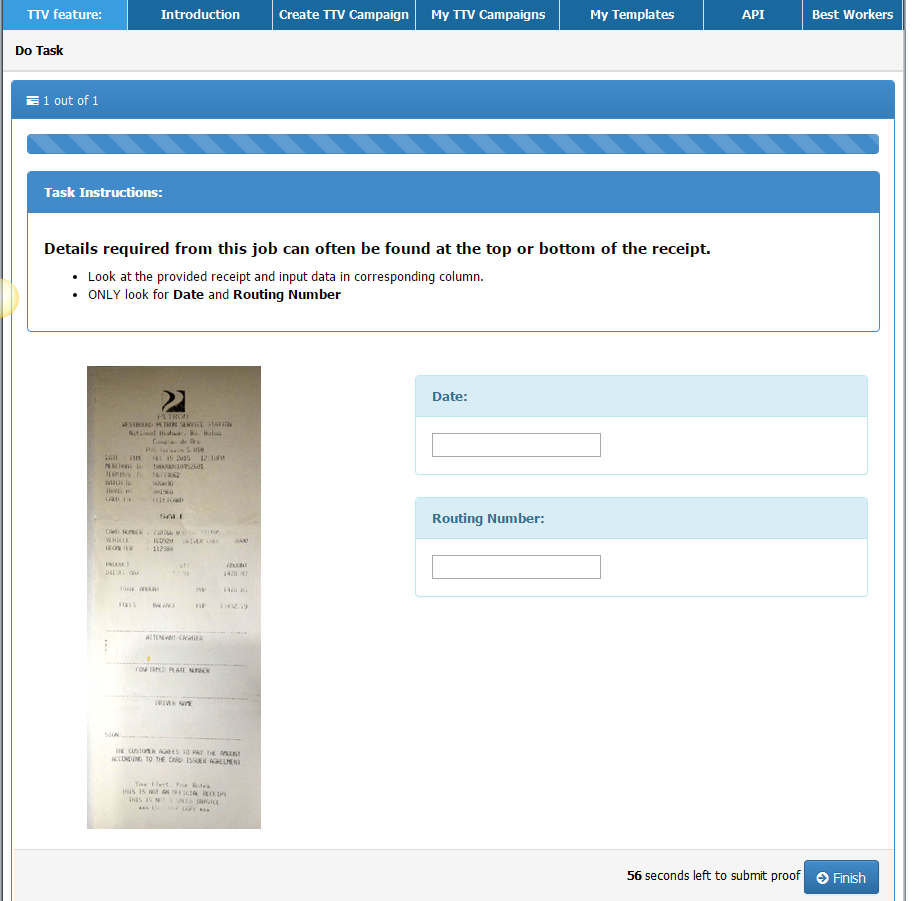
Considering we followed all guides described in how to craft the rest of the template (Instructions Section, Adding CSV, Adding images, the only update we will apply is in the data input.
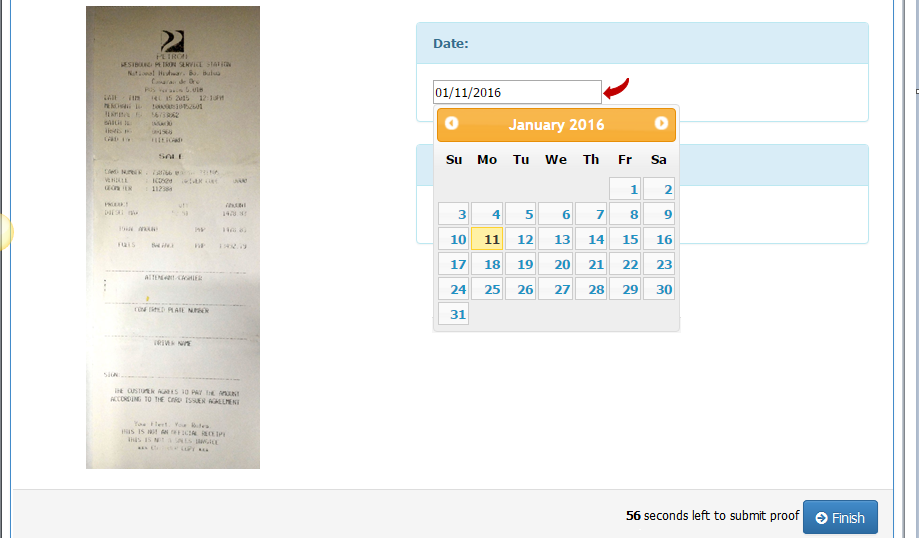
You will see the date input added here:
<!-- Date -->
 <div class="col-sm-6">
 <div class="form-group">
 <div class="panel panel-info">
 <div class="panel-heading"><span><strong>Date: </strong></span>
 </div>
 <div class="panel-body">
 <input class="date" name="date" type="text" />
 </div>
 </div>
 <!-- End Date -->
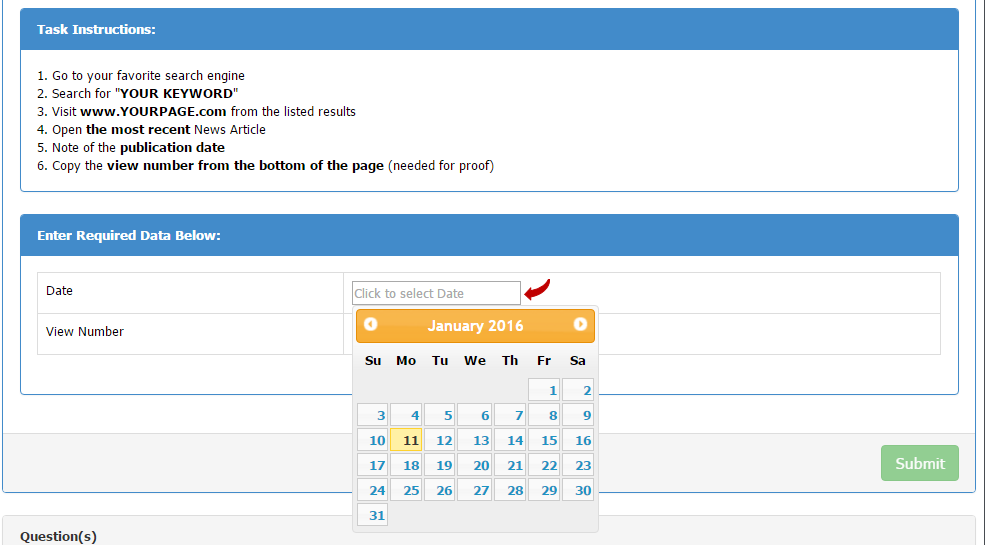
See outcome:
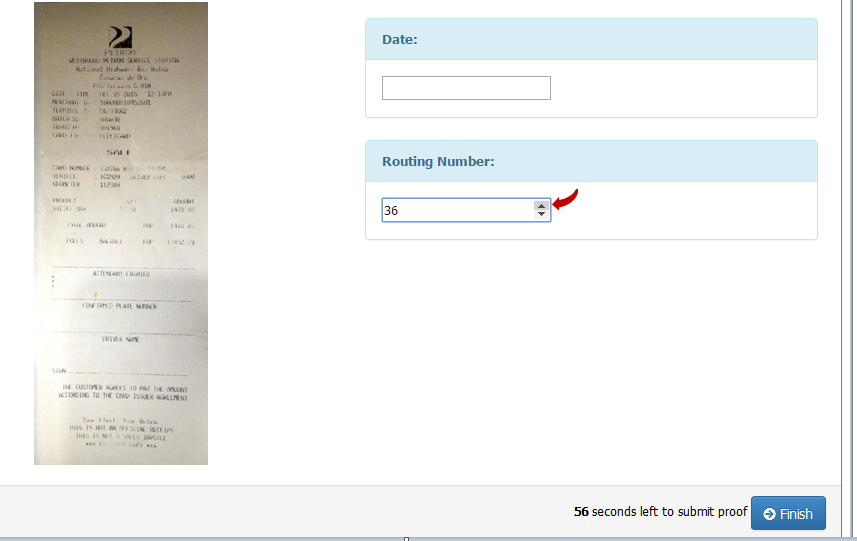
You will see the number input added here:
<!-- Routing -->
 <div class="panel panel-info">
 <div class="panel-heading"><span><strong>Routing Number:</strong></span>
 </div>
 <div class="panel-body">
 <input name="number" type="number" />
 </div>
 </div>
 <!-- End Routing -->
See outcome:
These pages were used as reference when crafting the above-samples; you might find them useful too:
Bootstraps tables, Boostraps Tables, Bootsraps form input, Image source attributes
___________________________________________________________
We may however try a simpler approach when your template does not involve any CSV or image integration.
Sample template (fields containing placeholder):
***Note that while the calendar is displaying, Workers can click the left or right arrows to change the month and year, or click a date to select one.
***Note that while on the Number Field, the Worker can click the up or down arrow to increase or reduce number display. Worker may also change the number from the text box, however, only takes numeric values. Any non-numeric values entered will not be accepted in the input field.
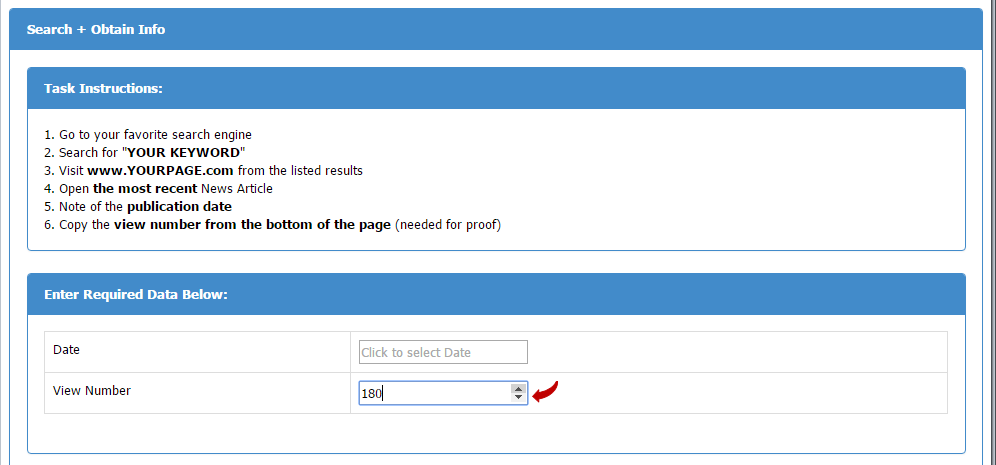
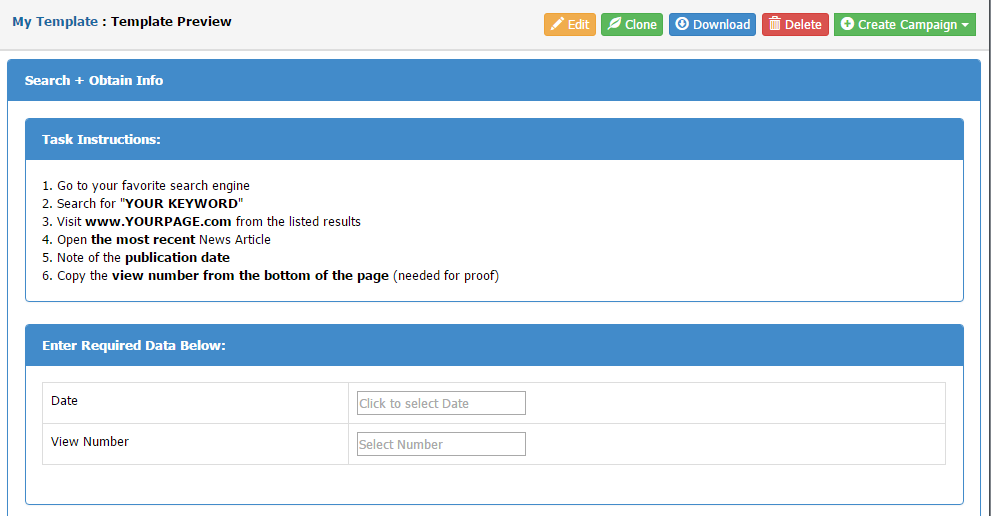
Task Instructions
In listing instructions, we utilized Primary Panel. You can use this guide to apply contextual and background colors or styles to add emphasis. For our example above, we chose a simpler layout.
<!-- Instructions --> <div class="panel panel-primary"> <div class="panel-heading"><strong>Task Instructions:</strong> </div> <div class="panel-body"> <ol> <li class="bg-default">Go to your favorite search engine</li> <li class="bg-default">Search for "<strong>YOUR KEYWORD </strong>"</li> <li class="bg-default">Visit <strong>www.YOURPAGE.com</strong> from the listed results</li> <li class="bg-default">Open <strong>the most recent</strong> News Article</li> <li class="bg-default">Note of the <strong>publication date </strong></li> <li class="bg-default">Copy the <strong>view number from the bottom of the page</strong> (needed for proof)</li> </ol> </div> </div> <!-- End Instructions -->
Proofs
In this section, we again utilized Primary Panel and placed input forms within a table for better layout, and adding placeholders for both date and number fields.
<!-- Proof -->
<div class="panel panel-primary">
 <div class="panel-heading"><strong>Enter Required Data Below:</strong>
 </div>
 <div class="panel-body">
 <table class="table table-bordered">
 <tbody>
 <tr>
 <td>Date
 </td>
 <td>
 <input class="date" name="date" placeholder="Click to select Date"
type="text" />
 </td>
 </tr>
 <tr>
 <td>View Number
 </td>
 <td>
 <input name="number" placeholder="Select Number" type="number" />
 </td>
 </tr>
 </tbody>
 </table>
 </div>
 <!-- End Proof -->
Coding References:
BS Panels, BS Tables, BS Input forms
You may apply the above-code in your template editor when needing date and time validation so it better suits your desired project.
Remember, all other default templates you see in your accounts page may be cloned and edited according to your liking. Whichever template you find closest to the project you have in mind, simply click the clone option, then edit. You may add the date and number input fields as described above if so required in your job.
No Comments so far.
Your Reply